Showing posts with label DIY. Show all posts

Thursday, 24 November 2016

Resolving (?) problems in the bedroom and The Blank Wall of Doom

You have seen my post back in April about Problems in the bedroom. I managed to paint 1 1/2 walls before Baby B made his appearance but that left us with the problem of three walls a different colour (and probably mouldy).

Luckily, SBB came to my rescue and set to work with his usual gusto and the walls were treated and painted with 3 layers of insulating paint and 2 top layers of Dulux.

Whilst we had the curtains down he also decided to remove the window trim to go in search of the awful draught around the window. As it happens, the cavity around the windows, which apparently should have been sealed/packed was just empty so he filled it with expanding foam and reattached the trim. Goodbye draught, hello slightly warmer room!

I'm not yet sure if the Thermalmix will do the job - I'll be keeping an eye out for any hint of mould! Temperature wise there seems to be a 6 degree difference between our video monitor next to the door and the Gro-egg in the far corner of the room (dropping to a chilly 15 degrees!). I'm not sure if it's really made a difference to maintaining room temperature as we didn't have the thermometers we have now, but with Baby B sleeping in with us, we've got an extra heater to try and keep it at a steady temperature.

Progress photos:
(Please excuse the mess!! We had to empty out the furniture before moving it)


Finished walls:


This does, however, leave me with a problem. Did you spot it?

I've come to think of it as The Blank Wall of Doom....

....Possibly a little over-dramatically, I'll admit.

I want to fill it with some pictures, but not sure how. I seem to be a persistent procrastinator when it comes to 'dressing' walls. I have a 'art wall' planned for the hallway which has over the last 5 years steamed ahead with the grand total of 1 picture.

So here are the options I'm thinking of (please excuse my terrible photo-shop skills):


The 'H' option


The 'M' option.

This is actually my preferred option, I quite like the idea of the pictures 'draping' across the wall, however I also know I'm a fan of straight lines so the 'H' option appeals to me too. One thing I'm really keen on is to have a mirror over the headboard - this is also partly why the 'M' option appeals because I think an oval mirror or other unusual shape would look really good here, particularly if it was a really old one with the stippling effect that old mirrors have.

Having discussed it with SBB, his preferred option is this: 


One large picture or mirror over the headboard. The simplicity - and minimum of effort - also appeals but I think it might look a little.... boring.
Perhaps it's just because I need another wall to procrastinate over.

Do you have any suggestions, or any favourite options? Let me know! I'm rather stuck... 


Tuesday, 1 November 2016

Keeping busy with craft projects part 2

This project is a favourite of mine. I got the idea from Carrots 'n' Cake. I just saw the photos of the kitchen and thought:

I need a shelf next to my oven.

So I bought some wrought iron effect shelf supports from ebay to match the door handles and a length of wood from B&Q.
I then measured and cut the wood to length, levelled and drilled holes in the wall... Okay, I'm lying. I got my Dad to help do the technical stuff while SBB was at work.
But I did varnish the shelf and screw it into place via the pilot holes my Dad had drilled for me... That counts, right?


Ooh, pretty, right?

But what to put on it.....?

I had a selection of storage jars I bought a couple of years ago from Ikea. I'd planned to use them at the flat to 'dress' the kitchen.
I bought some 'blackboard' labels and a chalk pen from Amazon. I debated a little about what to put in the jars, but decided to use them for the three main pastas/rice we use (rather than lentils etc, which I have to sneak past SBB!)


Ta da! It's funny how such simple things can be so pleasing!

Tuesday, 25 October 2016

Keeping busy with craft projects part 1

You would be forgiven - entirely - for thinking that our obsession for craft (well, mine) and DIY had waned with impending parenthood and in the bleary early months of babydom. Any mention of my craft projects has been sadly absent so I thought I'd take this opportunity to share some photos of what I've been up to.

Nursery lamp shade


The nursery is forest themed - I've yet to share the final photo of the mural, but it's rather fabulous if I do say so myself! 
Anyway, I searched for a forest themed shade for the ceiling light but the only one I could find was about £40 from John Lewis. A tad too expensive! So instead I bought a cheap uplighter from Dunelm Mill and covered the metal point with some paper leaves left over from our wedding. 
Simple, yet oh-so-satisfying.
Front door wreath


I do love a door wreath, but haven't ever shifted myself into gear to make one for Christmas - let alone a generic one. However, I have a thing about shoes indoors. Specifically, on my carpets. Call me a weirdo, call me a germaphobe... I don't care. Just don't walk shoes over my carpet.
The inspiration for this came from Hobbycraft - one of the newsletters they send out via email - the one in the photo was for Christmas, but it got me thinking.
I bought a polystyrene wreath, a ball of wool, decorative moss, twine ribbon and a slate sign. I used acrylic paint to paint the words.
It gives me warm fuzzies whenever I open the front door.

Nursery drawers


Eh.... So not really crafting, but a little piece of fun none-the-less. I'm not very good at measuring or cutting straight, so the liners are a little wonky, but they inject some fun into putting away/taking out the baby's clothes every day. 
And all for less than £1 from Card Factory!

Thursday, 28 April 2016

Problems in the bedroom

I don't know what you're thinking that titles means, particularly after admitting about cheating recently but I'm talking about mould.

Yes folks, we have a mouldy bedroom. We noticed it the first winter after we moved in and I became very familiar with the use of Ronseal's Mould Remover. However, it always seemed to come back. We'd been thinking about redecorating with some bathroom anti-mould paint but never quite seemed to get round to it.

Then, after the success with the Thermalmix in the nursery we decided it would be a good idea to paint the walls with the insulation paint before doing a top coat of bathroom paint.

The job had been lingering on my 'to do' list for a while until one day I bought the Thermalmix on Amazon and trundled off to B&Q to buy paint, because what else do you really want to be doing when you're 35 weeks pregnant other than squeezing behind the bed to strip and paint the bedroom wall?

I practically soaked the wall with mould remover before setting to work with the insulating paint.


I'd painted almost all of the wall when I noticed a tiny little flake in the last unpainted corner. I picked at it.


So, yeah. I ended up peeling off quite a bit of the old paint I'd just painted over. I was a little afraid of what SBB would say, but he didn't seem to mind too much. The good thing about peeling off the old paint was that it showed that it was riddled with mould - which could have meant regrowth - but the plaster itself was mould-free. So it turned out to be a good thing!

I ended up doing three coats. The instructions call for two but I wanted to be sure the wall was completely covered and covered well.

When it came to choosing colour I was struck with a small problem. I wanted to buy the Dulux bathroom paint as it came with a 5 year anti-mould guarantee, but they didn't have any in a similar sunny shade of yellow that I'd painted the room previously. They did have a yellow in the B&Q 'every room' paint - suitable for kitchens and bathrooms - but I wasn't sure about the anti-mould properties. I went with 'magnolia' in the Dulux bathroom paint. On the walls it looks more peach than magnolia, but I don't really mind. The room feels lovely and bright, so I'd call it a success!


Monday, 2 November 2015

Painting the nursery

I know this may seem a little premature as we haven't had the scan yet but it was a job that had been on the cards for a while.
Years ago when we moved in we painted the back bedroom a lovely apricot, thinking that it was a gender neutral colour that would suit whatever type of nursery we eventually ended up with. The colour was fine and in fact I think we would have kept it if not for one crucial problem; the texture was awful. Every time I reached in to turn on the light and missed, it was like running my fingertips over a blackboard *shudders*. SBB agreed and so it had to go.
We have a bit of a condensation problem in our house. The exterior walls are freezing - SBB is thinking about taking down the exterior brickwork and fitting some insulating board - but until that happens I've done some research into thermal paint additive. As we needed to redo the back bedroom it presented a perfect opportunity to experiment.

Before

Before

Before
I bought some Thermalmix paint additive, the instructions for which said it leaves a slight texture to the paint when dry - which, given the fact that we were repainting due to a texture problem, was a bit of a red flag. However, it also said that the thermal properties were still effective under a coat of normal emulsion. Perfect.
We went to B&Q picked up some basic white paint to mix it in to and also picked up some coloured emulsion for the top coat. We picked 'Custard Cream' - sounds deliciously edible and is such a lovely colour. There was only one pot on the shelf so I snagged it and carried it around the store, jealously guarding it.

I mixed the Thermalmix into the white paint - people on the reviews had suggested using a drill attachment to mix it but I did it by hand and it was surprisingly easy. I'm not sure if it was the additive or the paint already on the walls, but my 5 litre tub of white paint only just managed to cover the two walls - considering it was supposed to cover about 20 square metres - and you're supposed to do two coats - it was a little surprising and I had expected it to go further without watering it down.
When I'd painted one wall with two coats I tested the temperature and I thought the one painted with Thermalmix felt warmer. SBB wasn't convinced, but we'll see.


I painted the two exterior walls with a slight overlap on the interior walls to make sure the corners stay warmer and condensation free.


I painted them over two evenings and then tackled the top coat over the weekend.

After

After
The long exterior wall (the one without the window) didn't need to be painted with emulsion as I plan to paint a woodland mural on it. I've not settled on a design yet but I've been looking around the internet for inspiration.

Now that room's done I'm planning on tackling our bedroom and the living room - but as we're going to have to ensure everything at the flat's finished first I'm not sure if I'll get round to it before the baby arrives.
However, I picked up a paint chart in B&Q which has got me thinking about new colours....

Saturday, 15 August 2015

Little things make a big difference and a Sports Direct haul

<a href="http://www.bloglovin.com/blog/13219985/?claim=cxxxbsqfphr">Follow my blog with Bloglovin</a>

For a home improvement blog we haven't been doing much in the way of DIY recently. But we have done a couple of jobs that have been lingering on our 'to-do' list for years. Yes, that's right. Years.
We 'finished' the bungalow about three years ago - completing bits and pieces after we moved in. I think we even went a few months without a bathroom door but eventually the most important bits got finished and all the doors were hung... Except one.
The back bedroom, aka the junk room, aka the future nursery, had a door waiting to go on. I'd painted a base coat on one side but then I accidentally dropped it on it on the edge of a radiator and gouged a massive hole in it. SBB repaired it but I never got round to painting it. And so it sat, resting against the wall for 3 years. We didn't really mind that there wasn't a door on the back bedroom - plus Cillian enjoyed running in there and hiding under the bed when we weren't looking.
Then, last weekend when SBB decided that the door had been sat unused for far too long and decided to hang it. And here it is...!
Okay, it's not a very attractive door I'll grant you but it feels like we've finally got a complete house.
Another job that's been nagging at me was wardrobe storage. Years ago I bought a wrapping paper storage bag that is designed to hang on a hook on the back of a cupboard door. I'd intended to hang it in my wardrobe on a dowel rod and had even had it specially made in yellow and white fabric to match our bedroom. I'd told my dad about it and he very sweetly made four shaped blocks with holes pre-drilled to insert the dowel into.
Then, I'm ashamed to say, they sat, unused, on my dressing table for... ooh... probably about 2.5 years. But I've finally fitted them! Completely on my own too - SBB was out and I measured, I cut (slicing up my thumb nail in the process. Doh!) and I even used a level to make sure everything was square. It was the dirtiest level SBB owns (it lives in the garden and was covered in mud and spiderwebs) because he'd taken the key for his toolbox with him - but I was not deterred.
I was so happy to get them up - although I did forget to use the level when I attached the last one so it was a little wonky. Whoops.
But here they are, and I can't help smiling every time I open my wardrobe now.


Finally - just because I'm so chuffed - I'm going to share a clothing haul. SBB's Gran and Grandad always get me a M&S voucher for my birthday and sometimes for Christmas which is great because I only tend to shop there when I have a voucher.
This time I had a bit left on a old gift card and then this year's birthday voucher. I wanted to buy a new swimming costume as the last one I'd bought (also an M&S purchase) had been worn to death but when I got there they had the smallest section of swimwear I've ever seen and no basic, 'normal' costumes. For shame, M&S. For shame. The only option for me was the bandeau costumes which, for the bustier woman, were downright indecent. So that was a no. I left with a new pair of work trousers, three t-shirts (two white and one purple), a pair of white linen shorts and a birdhouse. I know the birdhouse seems a little random but I didn't want to leave anything on the gift cards and couldn't really find anything else I wanted - and who doesn't want to encourage birds to nest in their garden?

So, when I came home I went online in search of a new swimming costume. I just wanted a basic costume and I knew I'd seen some in Sports Direct so I headed to their website. I found some. I bought some. One for £3 and one for £4. That's right. £7 for TWO swimming costumes. Awesome. While I was there I decided to have a little browse of the rest of the sale and this is what I got:
2x swimming costumes
2x basic t-shirts
1x three-quarter length sleeve 'baseball' shirt
2x bikini bottoms
1x basic white vests
1x green vest
1x pair jeans
...all for the price of one M&S swimming costume. I was a little bit chuffed.

You can see my little spree in the picture below (although it doesn't include one of my white M&S t-shirts or the purple one as they're in the wash)

Have you recently bagged yourself a bargain?

Monday, 11 May 2015

Patio progress - part 3: The final push

SBB has been a real trooper, working on the patio, setting up jobs as part of his new business, constructing a new fence for the driveway, digging out the Mother of All Roots, digging a test hole to look at the foundations, breaking up a concrete path and pouring a new one... Like I said, a real trooper.

He's finished the patio and I'm absolutely thrilled with it.

Laying the slabs

Finished!

First steps on the (dry) patio
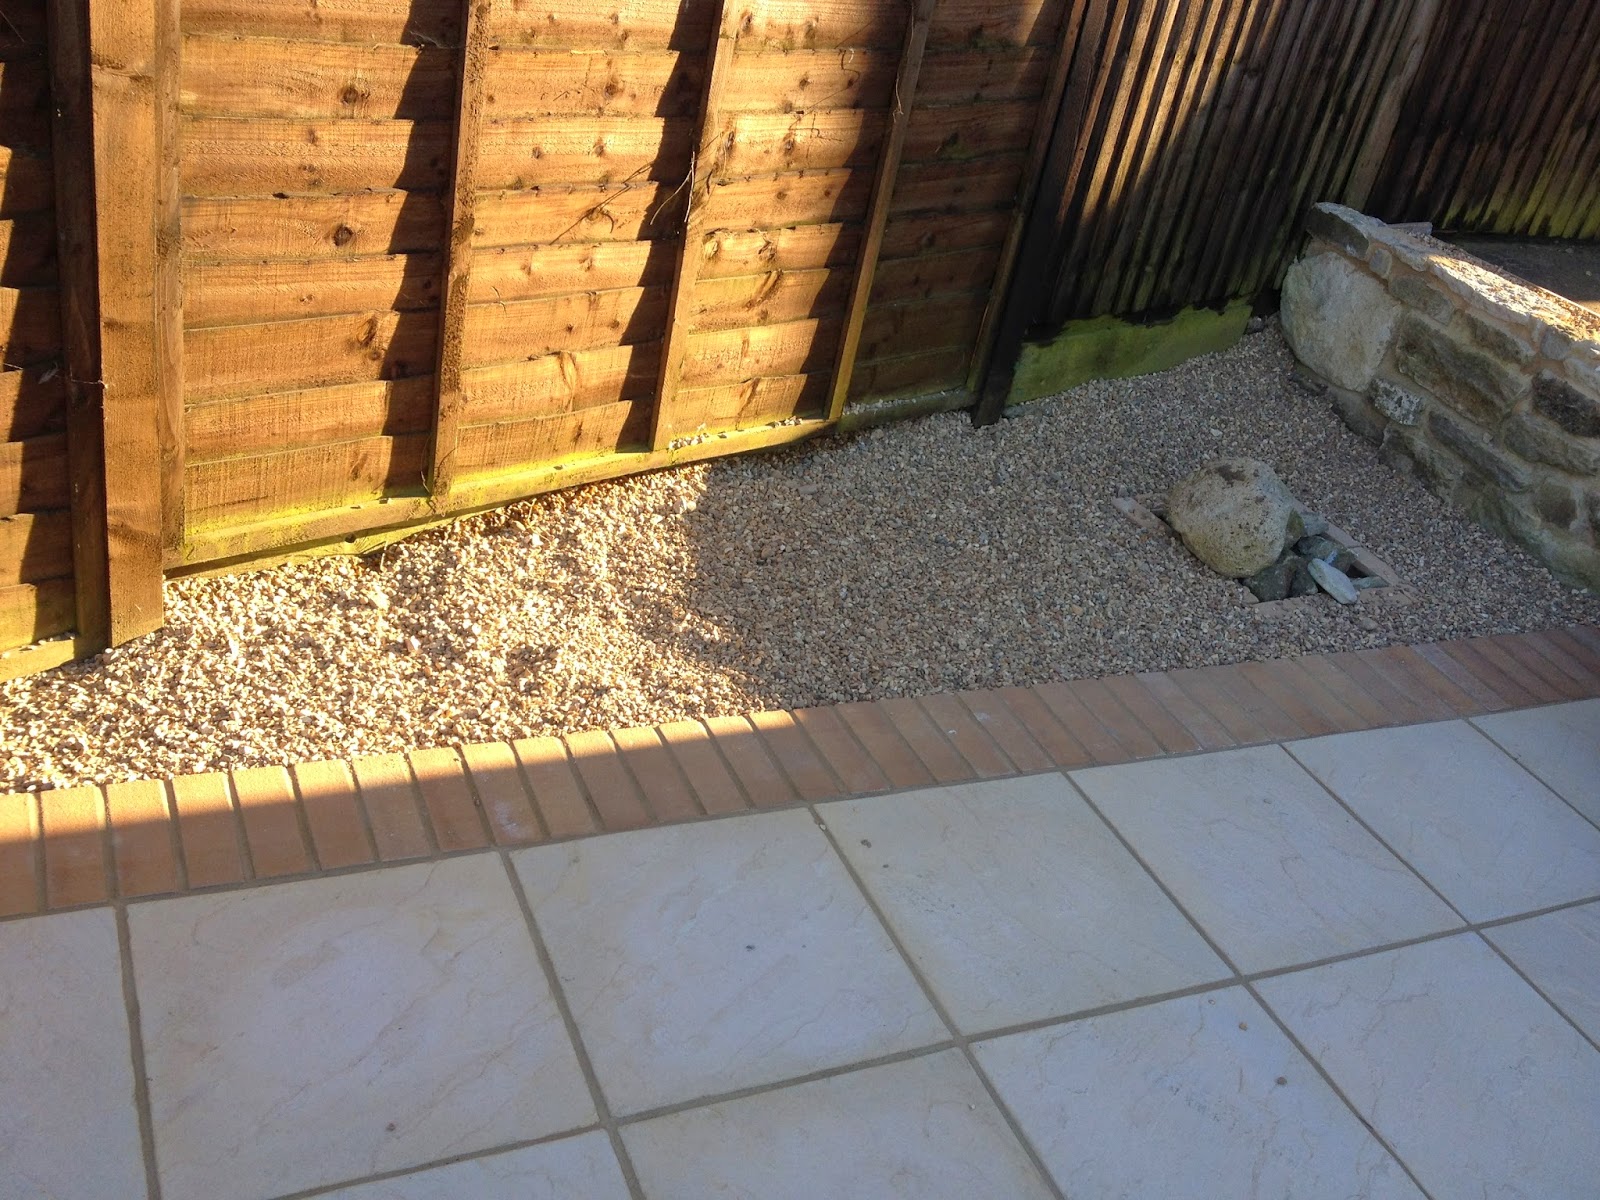
A couple of days after SBB had finished the patio we both got a bit of a bee in our bonnet about the state of the path (see huge ugly blue tarp etc in above photo) so we had a tidy up and it was like a huge weight was lifted off our shoulders. Then SBB decided to fill in the empty triangle with gravel. It's starting to feel a lot more finished now (just ignore the horrible red paint stains on the wall, I need to power-wash those off).


So, there it is. Did you see the flower pots? I went for some plain terracotta pots in the end. I didn't want to draw attention away from the feature wall (which is the real star of the show) plus, they were also two for £9. Bargain.

But.

Did you notice the deliberate mistake? You may remember that in my part 2 update I mentioned the pattern I was planning (lavender, forget-me-not, herb pot, forget-me-not, lavender). Slight problem with that, which I only realised when I put the plants in the four terracotta pots I'd bought. I have three forget-me-not plants - you can see the third one attempting to hide behind the loose stones on top of the wall. Oops. I may have to have a rethink.

Monday, 19 January 2015

Starting to tile

Saturday was a good day and I don't mean in a Klingon way! (waves to fellow Trekkies) We headed into Newport to run a couple of errands and I popped into my favourite charity shop to pick up some more photo frames for the photo wall I'm planning for our living room. I don't know what it is about the charity shops in Newport but only one ever seems to sell a good range of frames.

It also stocks concrete lions - I was so tempted!

Our haul
 The only thing I tend to buy from charity shops is photo frames that I can strip down and redecorate (which reminds me, I need to upload the ones I've already done!) but this time even SBB picked up a couple of things - the copy of Les Miserables and the classical CDs.
I also picked up this:
I actually can't stand Stilton but something about the pot just called to me and I could see it sat on my kitchen window sill.

I also clocked this little baby in the window of Mia in St Thomas' Square. One size £10. Bargain.

I know it's nearing spring and orange is more of an autumn colour but I'm still looking forward to wearing it.
After our little shopping trip we headed over to B&Q to pick out some trim for the tiles in the kitchen. We dabbled for a while with the idea about having a brushed metal edge to match the sockets but in the end decided that it would make the edges too obvious and might make the tiled area look small. The fact that they were also about three times the price swayed us a bit too!
Up at the flat SBB got to work on the tiles while I finished off the painting in the bathroom and worked on the windows in the living room. While I was painting the frames I noticed some of the trim had come loose so I squirted some sealant in that I had to hand and smoothed it down.

Work at the flat will be more of the same for the next few days I think!


Wednesday, 24 December 2014

Week 1 - Christmas Countdown and the last few days

A second post from me today as I wanted to finish the countdown before Christmas (and I've only got hours left!).
Spoiler: we didn't get it all finished but here's an update of where we've got to. We only managed to get Dad over one night during the week as he was pulling some serious overtime.

While he and SBB were working in the kitchen I started the gloss work in the bathroom. Remember how it last looked all the way back in week seven?


Painted on the left, unpainted on the right

It's getting there
Meanwhile, in the kitchen, SBB and Dad tackled the hole for the hob. This had to be done carefully - particularly when moving it after it had been cut as it could snap. They reinforced the thinner cut edge with another strip of wood and a couple of clamps.


However, when we slotted the hob into place there was a problem. We discovered that the support struts didn't allow the hob to sit neatly in the hole.

Area to be cut marked out
So we chopped out a segment and replaced the hob only to find that there was now a section on the left that was also in the way.


This was annoying to say the least and I wonder if everyone has this problem with B&Q kitchens and hob tops.

Once we got that sorted we moved on to the sink. There was a gap between the cabinet and the rim of the sink that, while not visible from standing, would be glaringly obvious when getting things out of the cupboard. Why, oh why, did B&Q design it this way? Anyway, our solution was to use an offcut of the leftover plinth and screw it onto the top of the cabinet.


There was one problem. The screws securing the center column sat proud of the wood so Dad used a little drillbit called a countersink to skim a little out of the top of the screw hole so that the screws sat flush to the wood. I was pretty impressed - I had no idea what that drillbit did!


We then screwed everything back together and I am so impressed with how it looks. It's really coming along don't you think?

For the rest of the week and the last few days I'm afraid life has gotten in the way of DIY.

Christmas buffet spread at work

Keeping warm at work - Sweet popcorn Options hot chocolate (couldn't really taste any popcorn)

Favourite steak meal at The Lifeboat - yum!
 All of which finally leads us up to tonight. Christmas Eve. All the presents are wrapped, I don't have to do any cooking until Boxing Day (when SBB and I have our own belated Christmas Day) and Midnight Mass is hours away unless I fall asleep first... :)


Hope you all have a lovely Christmas. x